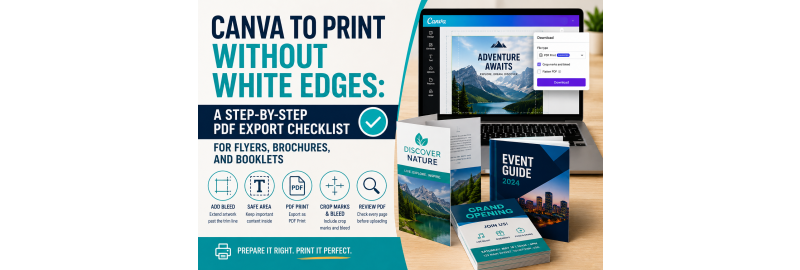
Canva to Print Without White Edges: A Step-by-Step PDF Export Checklist for Flyers, Brochures, and Booklets
Your flyer, brochure, or booklet looks perfect in Canva. The colors are bright, the text is aligned, and every image appears exactly where you want it.
Then the printed copies arrive with thin white lines around the edges, text sitting uncomfortably close to the trim, or images that do not look as sharp as they did on your screen.
These problems usually do not begin with the printing press. They often begin with how the Canva design was prepared and exported.
Best Value Copy accepts PDF files because PDFs help preserve the formatting, layout, and quality of a document as it moves between computers and printing systems. Submitting the right type of PDF can also reduce the chance of file problems delaying production.
Use this step-by-step checklist to prepare Canva files for professional printing, especially flyers, folded brochures, saddle-stitched booklets, manuals, programs, newsletters, and other multi-page materials.
Why Do White Edges Appear on Printed Materials?
Commercially printed materials are usually produced on larger sheets and then trimmed to their final dimensions.
Although commercial cutting equipment is precise, the cutting position can shift slightly from one piece to another. If a background color or image stops exactly at the finished edge of the document, even a small movement during trimming can expose a thin strip of unprinted paper.
Bleed solves this problem.
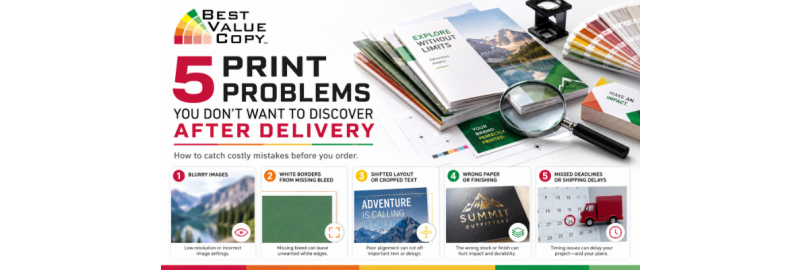
Bleed is extra background artwork that extends beyond the final trim line. The excess artwork is removed during trimming, allowing the color or image to reach the finished edge without leaving an unintended white border.
The commonly used industry-standard bleed is 0.125 inches, or approximately 3 millimeters, on every side. Individual printing companies or products may require different specifications, so the printer’s instructions should always take priority.
For example, an 8.5-by-11-inch flyer with 0.125-inch bleed on every side needs artwork extending across an area of approximately 8.75 by 11.25 inches before crop marks are considered.
Understanding the Three Important Areas
Before adjusting anything in Canva, understand these three parts of a print design.
1. Trim size
The trim size is the finished size of the printed piece after cutting.
For example:
-
An 8.5-by-11-inch flyer finishes at 8.5 by 11 inches.
-
A 5.5-by-8.5-inch booklet page finishes at 5.5 by 8.5 inches.
-
A 4-by-6-inch promotional card finishes at 4 by 6 inches.
Best Value Copy offers numerous finished sizes for flyers, brochures, booklets, and custom print projects. The size selected with the order should match the intended finished size of the design.
2. Bleed area
The bleed area extends beyond the trim size. Background colors, photos, patterns, and graphics that are supposed to reach the edge must continue through this area.
Bleed is not additional finished space. It is trimmed away.
3. Safe area
The safe area is inside the trim line. Headlines, body text, logos, page numbers, QR codes, phone numbers, and other essential content should remain inside this area.
Do not place important information directly against the edge simply because it looks correct on your monitor. Leaving comfortable interior space protects the content from minor cutting variations and usually produces a cleaner design.
The Canva-to-Print PDF Checklist
Step 1: Start With the Correct Finished Size
Create the Canva document using the exact finished size you plan to order.
Do not create a generic presentation, social media graphic, or letter-size page and then attempt to resize it during the upload process. Scaling a design after completion can change margins, image quality, font sizes, line breaks, and fold positioning.
Before designing, confirm:
-
Final width
-
Final height
-
Portrait or landscape orientation
-
One-sided or two-sided printing
-
Number of pages
-
Folding or binding style
-
Whether the design will print to the edge
Best Value Copy allows customers to choose the finished page size, paper stock, printing sides, bleed, folding, stapling, binding, covers, and other finishing options when configuring many print products.
Step 2: Turn On Canva’s Print-Bleed View
Before finalizing the layout, turn on Canva’s print-bleed display.
Depending on the version of Canva you are using, the option may appear under File, View settings, or a similar design-view menu.
A guide will appear outside the normal page edge. This represents the area that may be trimmed from the finished product.
Turning on the bleed view is not enough by itself. You must also extend the artwork into it.
Step 3: Extend Every Edge-to-Edge Element Into the Bleed
Review every page and identify anything intended to reach the finished edge.
This may include:
Drag or resize each of these elements until it reaches beyond the trim line and completely fills the visible bleed area.
Do not stretch a small photograph excessively just to fill the bleed. Enlarging a low-resolution image can cause softness or pixelation in the printed result.
The purpose of the bleed is to provide extra printable artwork outside the trim, preventing white gaps if the cut moves slightly.
Step 4: Move Important Content Away From the Edges
Bleed protects backgrounds. It does not protect text or logos placed too close to the cut.
Move important content safely inside the page, including:
A thin decorative border positioned very close to the edge can make even a minor trim variation look obvious. Moving borders farther inside the page or removing them entirely often produces a more consistent result.
Step 5: Check Image Quality at the Intended Print Size
A photograph may look sharp on a phone or computer screen but appear blurry when printed.
Avoid using:
-
Screenshots
-
Images copied from social media
-
Small website thumbnails
-
Photos repeatedly saved and compressed
-
Logos downloaded as tiny JPG files
-
Images enlarged far beyond their original dimensions
Whenever possible, upload the original high-resolution photograph, logo, or graphic.
Pay special attention to full-page photographs and booklet covers. These images are enlarged more than smaller supporting images, making quality problems more noticeable.
Step 6: Prepare Two-Sided Flyers Correctly
For a two-sided flyer, the PDF should include two pages:
-
Front
-
Back
Best Value Copy counts the front and back as two pages and allows customers to select single-sided or double-sided printing when configuring the order.
Before exporting, confirm that:
-
Both pages use the same dimensions.
-
Both pages have bleed where needed.
-
The front and back are oriented correctly.
-
Nothing important is too close to an edge.
-
The second page is not accidentally upside down.
Do not place the front and back next to each other on one oversized Canva page unless your printer specifically requests that setup.
Step 7: Check Folded Brochure Panels Carefully
Folded brochures require more planning than flat flyers.
Best Value Copy offers multiple folding options, including letter folds, Z folds, half folds, right-angle folds, and formats designed to fit envelopes.
Before exporting a brochure, verify:
-
Which panel becomes the front cover
-
Which panel becomes the back cover
-
Which panel folds inward
-
Whether the fold is a letter fold, Z fold, half fold, or another format
-
Whether any text crosses a fold
-
Whether photographs of people or products cross a fold
-
Whether the call to action appears on the correct panel
Do not assume that every fold uses identical panel widths. The panel folding inside may need to be slightly narrower for some folding configurations.
Use the layout template or folding instructions supplied for the product whenever possible. Crop marks show where the printed sheet is trimmed. They do not automatically show where a brochure will be folded.
Step 8: Prepare Booklet Pages in Reading Order
For most booklet orders, create the pages in normal reading order:
-
Front cover
-
Inside front cover or first interior page
-
Next interior page
-
Continue through the document
-
Inside back cover
-
Back cover
Do not manually rearrange pages into printer spreads unless Best Value Copy specifically requests imposed pages.
Best Value Copy offers saddle stitching and several other binding choices, including comb, plastic coil, wire, perfect, velo, and tape binding. The available cover and binding choices can affect page setup, margins, and the finished appearance.
When printed covers are selected, Best Value Copy uses the first page or first two pages of the uploaded PDF for the front cover, depending on whether the cover is configured as single-sided or double-sided. The last page or last two pages are similarly used for the back cover.
Before exporting a booklet:
-
Confirm the final page size.
-
Confirm the page order.
-
Check for missing or duplicated pages.
-
Make sure every page uses the same dimensions.
-
Keep page numbers away from trim and binding edges.
-
Leave additional interior margin when using thicker binding styles.
-
Verify that blank pages are intentional.
-
Confirm the selected binding before approving the final page count.
Step 9: Export as PDF Print
When the design is complete:
-
Select Share.
-
Select Download.
-
Choose PDF Print as the file type.
-
Select all required pages.
-
Turn on Crop marks and bleed.
-
Review any available color-profile settings.
-
Download the PDF.
Canva identifies PDF Print as the higher-resolution PDF option for physical printing and allows crop marks and bleed to be included in the export. PDF Standard or PDF Digital is primarily intended for digital sharing and smaller file sizes.
Do not submit your finished Canva project as:
-
A screenshot
-
A Canva editing link
-
A low-resolution JPG
-
A compressed social media image
-
Separate PNG files when a multi-page PDF is needed
-
A PDF Standard export when PDF Print is available
Best Value Copy accepts PDF files because the format is better suited to preserving the design’s layout and quality during production.
Step 10: Consider the Color Profile
Computer screens display color using emitted light, while commercial printing reproduces color with ink or toner. This means some bright colors may look different in print than they do on a screen.
For print work, CMYK is generally preferred because it corresponds to cyan, magenta, yellow, and black printing colors. RGB offers a wider range of bright screen colors, some of which cannot be reproduced exactly in CMYK.
If Canva provides a color-profile option in your account:
-
Choose CMYK for commercial printing unless the printer has given different instructions.
-
Review photographs, dark backgrounds, bright blues, greens, and neon-style colors carefully.
-
Remember that exact screen-to-print matching cannot be guaranteed because monitors display colors differently.
A printed proof can be helpful for color-sensitive projects, large booklet orders, branded materials, annual reports, donor publications, and other important pieces. Best Value Copy offers an optional paper proof on several product-order pages.
Step 11: Decide Whether to Flatten the PDF
Canva may present an option to flatten the PDF.
Flattening merges the PDF’s separate elements into a simplified layer, which can help preserve element placement across different systems. Canva specifically describes flattening as a way to keep a print layout in its finalized form.
Flattening should be treated as an optional final-production step, not a substitute for checking the file.
Before flattening:
-
Finish all edits.
-
Proofread every page.
-
Verify links and QR codes.
-
Save an editable Canva version.
-
Confirm that the exported PDF still looks sharp.
Step 12: Open and Inspect the Downloaded PDF
Never assume the export is correct simply because the Canva design looked correct.
Open the downloaded PDF and inspect every page.
Check the following:
-
Crop marks appear outside the finished page.
-
Background artwork extends beyond the crop marks into the bleed.
-
No unexpected white edges appear.
-
Text has not shifted.
-
Fonts display correctly.
-
Images remain sharp.
-
Page order is correct.
-
Blank pages are intentional.
-
Nothing is cut off.
-
Brochure panels are arranged correctly.
-
Booklet covers appear in the correct positions.
-
The number of PDF pages matches the order.
Zoom in to inspect small text, QR codes, fine lines, page numbers, logos, and image quality.
Then zoom out and review the document as a complete piece.
Common Canva-to-Print Mistakes
Mistake 1: Selecting PDF Standard
PDF Standard is useful for email and online sharing, but PDF Print is the better choice for physical printing because it provides higher-resolution output and supports crop marks and bleed.
Mistake 2: Turning on bleed without extending the artwork
The bleed setting cannot create missing background artwork. If the background stops at the trim line, the exported file may still contain empty bleed space.
Every edge-to-edge background must physically extend into the bleed area.
Mistake 3: Placing text in the bleed area
The bleed area is intended to be trimmed away. It should contain extensions of backgrounds and images, not important wording or logos.
Mistake 4: Using crop marks as fold guides
Crop marks indicate where the sheet will be trimmed. They do not identify brochure folds or booklet binding positions.
Mistake 5: Exporting booklet spreads
Unless specifically requested, booklet pages should generally remain as individual pages in reading order rather than being manually paired into spreads.
Mistake 6: Ordering the wrong finished size
Your Canva design size and the finished size selected during ordering must correspond. A mismatch can lead to scaling, unexpected borders, cropping, or production questions.
Mistake 7: Forgetting to select bleed when ordering
Best Value Copy product configurations include a Bleed or “print to edge of page” selection. Choose that option when the finished piece is designed with backgrounds or images extending to the edge.
Final Canva PDF Export Checklist
Before uploading your file, confirm:
-
The Canva design uses the correct finished size.
-
The page orientation matches the order.
-
The bleed view was enabled.
-
All edge-to-edge artwork extends through the bleed.
-
Important text and logos remain inside the safe area.
-
Images are high resolution.
-
Two-sided pieces contain separate front and back pages.
-
Brochure panels match the selected folding style.
-
Booklet pages are in the correct reading order.
-
Cover pages are positioned correctly.
-
The file was exported as PDF Print.
-
Crop marks and bleed were included.
-
The appropriate color profile was selected.
-
Every page was reviewed in the downloaded PDF.
-
The Bleed option was selected when configuring the print order.
-
The uploaded PDF page count matches the order.
Print Your Canva Design With Confidence
Canva makes it easier for schools, nonprofits, businesses, designers, agencies, restaurants, houses of worship, community organizations, and other customers to create professional-looking materials without advanced design software.
The final result, however, still depends on proper file preparation.
Starting with the correct dimensions, extending backgrounds through the bleed, keeping important content inside a safe area, and exporting as a PDF Print file can prevent many common printing problems.
Best Value Copy offers flyer, brochure, booklet, and custom printing with multiple sizes, paper stocks, folding options, binding choices, covers, and print-to-edge options.
Once your Canva design is ready, carefully inspect the exported PDF, select the correct printing and finishing options, and upload the final file with your order.
A few extra minutes spent checking the PDF can help prevent white edges, clipped text, incorrect panels, production delays, and disappointing printed results.